Friday, November 19, 2010

How to Embed Google Mp3 Player in Gmail?


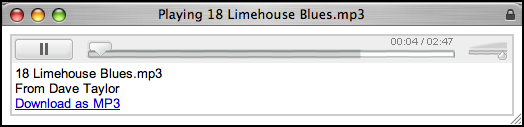
Google has apparently added an MP3 playing feature to Gmail. So, if someone emails you an mp3 as an attachment, the little google player will come up to allow you to play the sound right from Gmail. Very neat.


You can also embed this player in your website so your visitors can listen to an audio clip right from any page.
To embed MP3 songs in your Blog or website, use the following Google Video Player wrapper code:


Remember to replace MP3_FILE_URL with the actual location of the MP3 file on the web and play it inside Google Video. You can add autoplay by just adding music_source.mp3&autoPlay=true". Have Fun!..
Google Code.

Tuesday, April 27, 2010

How to Share an Internet Connection in Windows 7


If you want to share one Internet connection among several computers, you have two options:
  • Use Internet Connection Sharing (ICS).

  • Use a router.

Note: Click here for Windows XP Environment

How does ICS work?

First, you need one computer, called the host computer, that is connected to the Internet and that has a separate connection to the other computers on your network. You enable ICS on the Internet connection. The other computers on your network then connect to the host computer, and from there to the Internet through the host computer's shared Internet connection.

Set Up the Computer That Will Share the Connection (Host computer)

Start with the computer that will share the Internet connection. First set up your Internet connection,and then use the Network Setup Wizard to configure the computer by taking the following steps

Create and test an Internet connection using the information in the “Connecting to the Internet”.

Click on start Right-click Network and choose Properties from the context menu. You’ll see the Network and Sharing Center window.Click the Manage Network Connection link.


You’ll see the Network Connection window.You must have a minimum of two active network connections to make ICS work. The first connection is from your computer to the Internet. The second connection is from your computer to the rest of the network.


Right-click the connection to the Internet and choose Properties from the context menu.Select the Sharing tab. You’ll see sharing options like the ones shown.Check the first option to let other people use this connection to access the Internet. If you want to also allow others to manage the connection ,check the second option.Click Settings.


You’ll see the Advanced Settings dialog box shown where you can control the services that others can use on your system.


Check the standard services that you want other people to access.lick Add to add custom services to the list. You’ll see the Service Settings dialog box . Custom services require that you provide an IP address and port umber. You can make your custom service less vulnerable by choosing a different setting for the fourth field, Internal Port number for This Service, to a different value than the external port number.Click OK to add the custom service. ICS enables the option automatically.
Click OK twice to make the ICS connection functional. Vista will ensure that the connection doesn’t have any problems such as address conflicts.


Setting Up a Client Computer

Next, set up the first of your client computers. Make sure the Internet connection is still open on the computer you set up to share it, and then take the following steps

Open the Internet Options applet in the Control Panel. You’ll see the Internet Properties dialog box. Select the Connections tab.

Choose the Never Dial a Connection option.Click LAN Settings to display the Local Area Network (LAN) Settings dialog box.

Check the Automatically Detect Settings and the Use Automatic Configuration Script
options. Clear the Use a Proxy Server for Your LAN option. Click OK twice to change
the settings.

NOTE: You may have to reboot or at least log out and then back into the system to make the connection work. Windows may not acknowledge the availability of the shared connection otherwise.
Monday, April 26, 2010

How To Restore GRUB


GNU GRUB (short for GNU GRand Unified Bootloader) is a boot loader package from the GNU Project. GRUB (shortened form of GNU GRUB) is the reference implementation of the Multiboot Specification, which enables a user to have multiple operating systems on their computer, and choose which one to run when the computer starts.

You have windows XP and linux on the same hard disk and you choose GRUB as boot loader.At boot time you see a menu to choose windows or linux.
But one day you reinstall Windows XP and it rewrites your MBR and the menu has gone, now you only can boot windows.

What to do:
Put the redhat boot disk you created on the installation on the floppy drive, boot the system and run grub command

Remember that for grub (hd0,1) means hda (primary controller master), second partition.

Now we need to tell grub where are the grub files:

If you know where they are, type something like:
root (hd0,1)

else if you have no idea, type:
find /boot/grub/stage1
and then the root command with the correct parameters:

setup (hd0)
to install it on hd0, that is MBR of the first HD.

type quit and reboot.
The menu will appear again.
If you want to make some changes to the boot menu, you must edit the file: /boot/grub/menu.lst

A sample menu.lst file is this:

default=0
timeout=5
splashimage=(hd0,1)/boot/grub/splash.xpm.gz

title Red Hat Linux (2.4.18-14)
root (hd0,1)
kernel /boot/vmlinuz-2.4.18-14 ro root=LABEL=/ hdc=ide-scsi
initrd /boot/initrd-2.4.18-14.img
title Red Hat Linux (2.4.18-openmosix3)
root (hd0,1)
kernel /boot/vmlinuz-2.4.18-openmosix3 ro root=/dev/hda2 hdc=ide-scsi
initrd /boot/initrd-2.4.18-openmosix3.img
title WindowsME
rootnoverify (hd0,0)
chainloader +1

Friday, April 23, 2010

There's no place like 127.0.0.1


The IP address 127.0.0.1 is a special purpose address reserved for use on each computer. 127.0.0.1 is conventionally a computer's loopback address.

Network software and utilities can use 127.0.0.1 to access a local computer's TCP/IP network resources. Messages sent to loopback IP addresses like 127.0.0.1 do not reach outside to the local area network (LAN) but instead are automatically re-routed by the computer's own network adapter back to the receiving end of the TCP/IP stack.

Typically all IP addresses in the range 127.0.0.1 - 127.255.255.255 are reserved for private use, but 127.0.0.1 is by convention the loopback address in almost all cases.